How to choose a telescope?
Choosing the perfect telescope for your stargazing adventures can be a daunting task, especially with the vast range of telescopes and accessories readily available on the market. This guide will help you navigate through the selection process by exploring the types of telescopes available and discussing their key features, including the size of the primary lens or mirror, the type of frame, portability, computerization, and accessories. We will also examine each telescope’s compromises, as every tool has its advantages and disadvantages.
To determine which telescope is right for you, it is important to consider what you want to observe, the darkness of the sky in your area, your level of experience, your budget, and the amount of space you have available. By answering these questions and familiarizing yourself with the different telescopes available, you can choose the perfect telescope that will accompany you on your stargazing journey for many years to come.
But before we dive into the different types of telescopes, let’s first take a closer look at the basics of their operation. This will help you gain a better understanding of how telescopes work and what features are important to consider when selecting a telescope that meets your needs.
Magnification is not everything
It may come as a surprise, but the opening of a telescope, also known as the aperture, does not determine its magnification power. As a beginner, you may ask, “How much does it magnify?” The answer is, “As much as you want.” Any telescope can provide a wide range of magnifications, depending on the lens inserted inside.
However, it’s important to note that a higher magnification power is not necessarily the best option. The power that shows a decent view with a given tool is limited by two main factors: the aperture and weather conditions.
The image created by the main lens or mirror of a telescope contains limited details, so it’s important to find the optimal magnification that allows you to see these details without distributing the precious light of the subject too much, resulting in a soft, indistinct image. Observers typically use lower powers to observe dimmer bodies like galaxies and nebulae, and medium-high powers for brighter objects like the Moon and planets. Just as enlarging a photograph too much would only show the grains of the film or the pixels of the chip, too much magnification can make the object you’re observing out of focus.
How much power is too much power?
Determining the optimal magnification for your telescope can be a bit tricky. A simple rule to follow is to use a magnification that is 50 times the aperture of your telescope in inches, or twice the aperture in millimeters. However, this is dependent on the quality of the telescope’s optical components and the stability of the night air. For instance, a high-quality 4-inch (100mm) telescope should not be pushed beyond 200x.
In contrast, a small 60mm telescope from a department store that promises a “300 power!!!” is only using false advertising to attract customers. So, be sure to avoid such misleading claims and make informed decisions based on your needs.
Calculating the magnification of the telescope
Now that you know the maximum practical power for each type of telescope, you may be wondering how to achieve that power. The numbers on the eyepiece represent the magnification they provide. Each telescope has a focal length, which is the distance from the primary lens or mirror to the image it forms. This number is typically printed or engraved on the telescope and can range from 400 to 3000 millimeters, depending on the aperture and type of telescope.
Even eyepieces have a focal length, such as 25mm or 10mm. To calculate the magnification of your telescope, simply divide the focal length of the telescope by that of the eyepiece. For example, a telescope with a focal length of 1000mm used with an eyepiece of 25mm has a power of 1000/25 = 40 (or 40x magnification).
Why is the Moon blurred?
Even with the best telescope, it’s possible to see smaller details on the Moon and planets on some nights more clearly than others. At higher magnification powers, planets and stars can appear to twinkle and become cloudy on most nights. This is not a fault with the telescope, but rather a result of the turbulent atmosphere of the Earth, and local conditions such as hot air rising from nearby asphalt that has collected solar heat throughout the day. Astronomers refer to such turbulent nights as “bad observing conditions.”
Large apertures allow observers to see the weakest objects and smallest details on the Moon and planets. However, regardless of the aperture, the better the view, the better the visual experience. Calm air is essential for good viewing, and larger telescopes, including those with apertures of 25mm and above, are often limited to 250x or 300x magnification on most nights, except for really calm ones.
With practice, you will be able to see more detail in the image not only because your eye will be trained, but because the longer you look, the more likely you are to capture moments of unusual atmospheric calm. Experienced observers know that patience and persistence are key to getting the most out of their telescopes.
Are bigger telescopes always better?
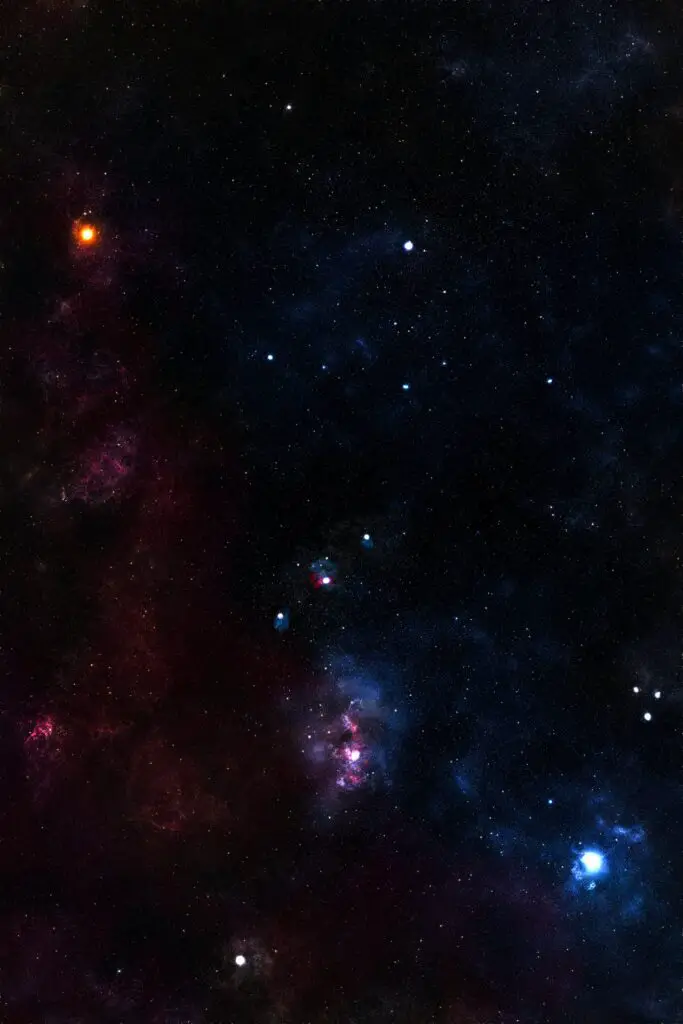
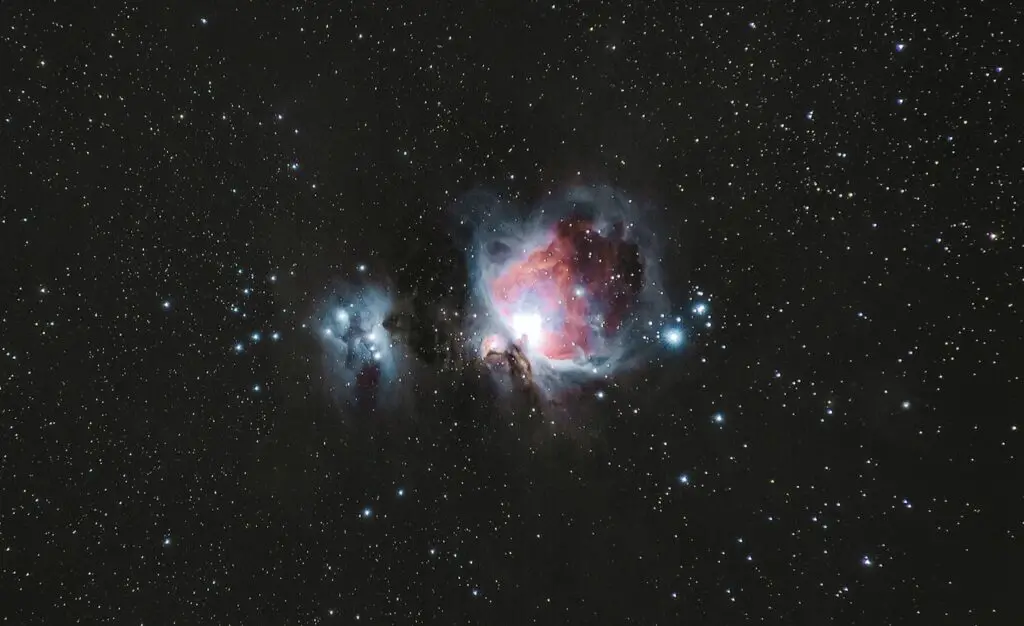
Choosing a large aperture telescope is desirable for observers who want to collect as much light as possible to observe deep sky objects such as galaxies, nebulae, and star clusters. These objects are usually observed at lower powers, so the quality of the atmospheric view is not a problem. Large apertures also result in shorter exposure times for astrophotography enthusiasts, especially when combined with a short focal length.
However, larger telescopes require a permanent observatory or charitable friends who can help transport and assemble it at each observation session. Portability must be considered, and everyone has their own vision of what is “portable.” While it’s easy to get caught up in “aperture fever” and buy the largest telescope possible, it’s essential to choose a size that is convenient for regular use. Remember, the most frequently used telescope is the one that will show you the most things.
Pay close attention to the weight of the telescope, which is usually indicated on the instruction sheet. Carrying a weight equal to the weight of the telescope you want to buy and testing it out is a good idea. Consider how often you are willing to transport the telescope from storage to observing locations, especially if there are stairs involved.
Telescopes of all shapes and sizes
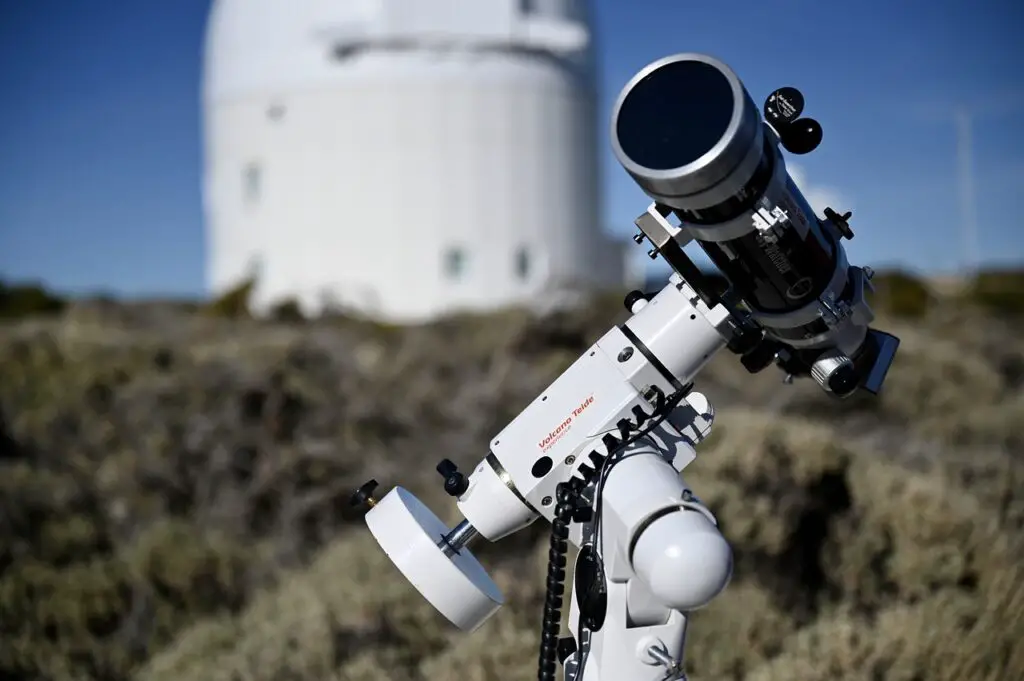
Telescopes come in many different shapes and sizes, but they can be classified into three types: refractors, reflectors, and compounds. Refractors are the classic stereotype of a telescope, featuring a long metal tube with large lenses in front and an eyepiece behind. The front lenses focus the light to form an image on the back, which is viewed through the eyepiece.
Refractors are often preferred by planetary and lunar observers who value crisp, high contrast images that can withstand high magnifications. When made well, a refractor can provide the best quality images obtainable with a given aperture. They also tend to misalign less often and are more robust than other telescopes, making them suitable for those who want a tool that is easy to handle.
However, a good quality and large objective lens is expensive to make, resulting in refractors often being the most expensive type of telescope. They can also be uncomfortable to use because their tubes can be 1 meter or more long. As a result, a very high tripod is needed to observe objects standing very high, and the tripod must be solid to prevent wobbling at high powers.
Refractors Telescopes
Refractors have several advantages, including their robustness and the high quality of images they provide. They are ideal for those looking for a tool to take away or who do not want to tinker with optical components. However, they come with a high price tag, especially for a large objective lens, which is a piece of art that requires a special type of glass and must be made by hand.
Refractors tend to have narrower fields of view, which may not be suitable for deep sky observers who need a more developed light capture capability to observe dim objects. Modern optical designs have resulted in shorter and more handy refractors, but these come at a higher cost. Overall, when choosing a refractor, the most important factor to consider is the aperture and the quality of the objective lens.
Refractors Telescopes
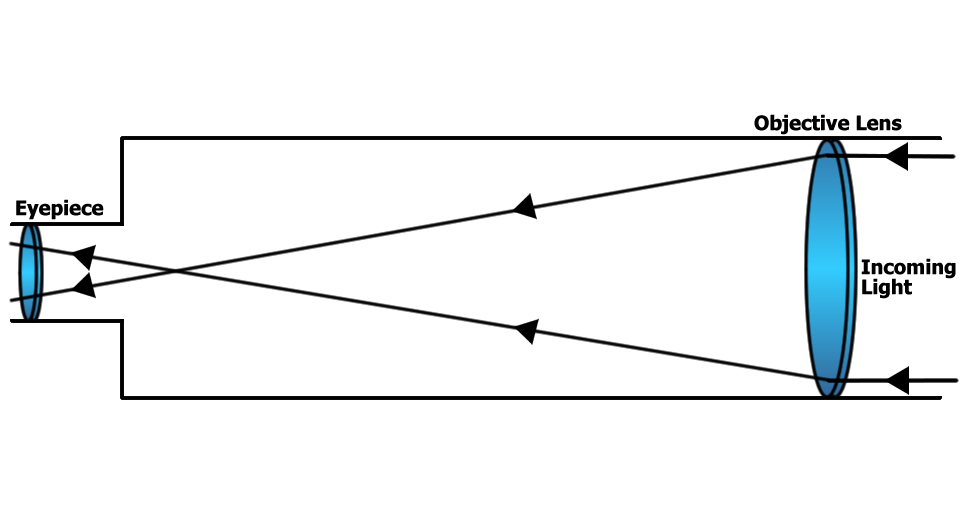
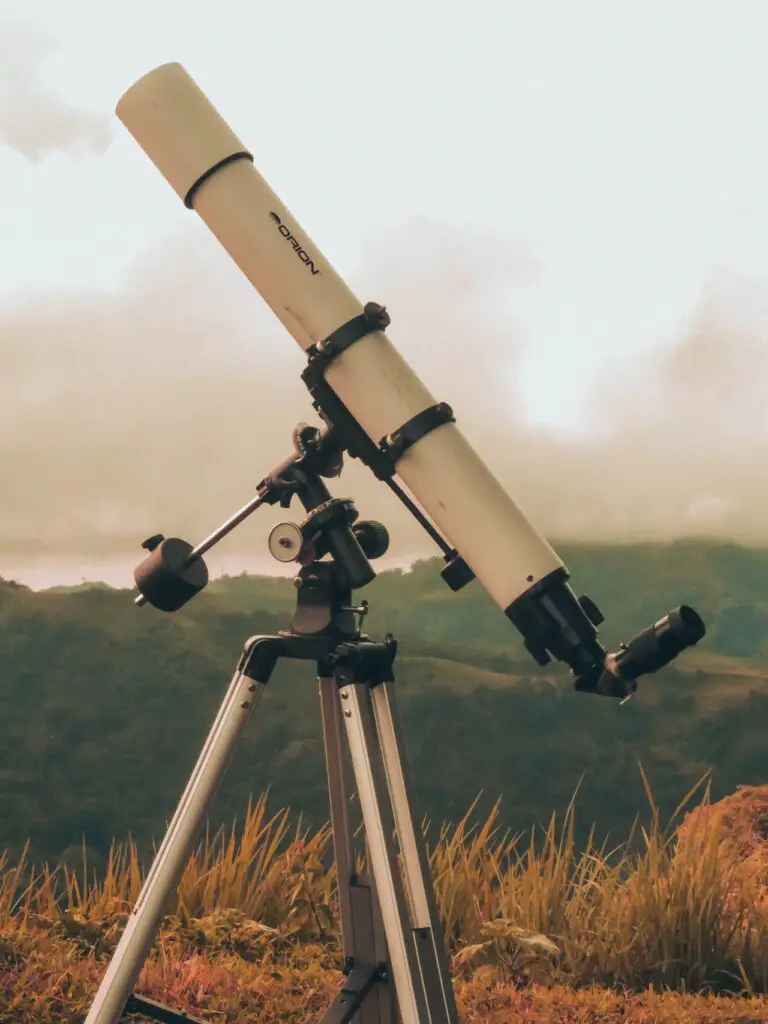
A refractor is the stereotype of the telescope par excellence – a long, sparkling metal tube with large lenses in front and an eyepiece behind. The front lenses (the lens) concentrate the light to form an image on the back. The eyepiece is a small magnifying mirror with which you will look at this image.
Planetary and lunar observers who value their crisp, high contrast images that can withstand very high magnifications are often looking for high quality refractors. In fact, if done well, a refractor can provide images of the best quality obtainable with a given aperture.
Another advantage of the refractor is that it is generally more robust than other telescopes, because its lenses tend to misalign less often. For this reason, the refractors are suitable for those looking for a tool “to take away” or who do not want to tinker with optical components. However, these excellent features come at a price.
A good quality and very large objective lens is a piece of art that requires a special type of glass and must be made by hand. In fact, the refractors of any aperture are often the most expensive tools. Furthermore, in their most commonly encountered forms, the lengths of the tubes of a refractor can prove to be uncomfortable.
A 100mm refractor can also be 1 meter or more long. And, since, the eyepiece is located at the low end of the tube, if you want to observe objects standing very high, you must also buy a very high tripod. A similar tripod must be very solid to prevent wobbling at high powers, so it could be heavy and difficult to handle, not to mention expensive.
For deep sky observers, a refractor may not have a sufficiently developed light capture capability to observe dim objects, and the field of view may be narrow. Modern optical designs have led to shorter and more handy refractors, but at a corresponding higher cost.
It is done with mirrors.
The Best of Both Worlds: Catadioptric Telescopes
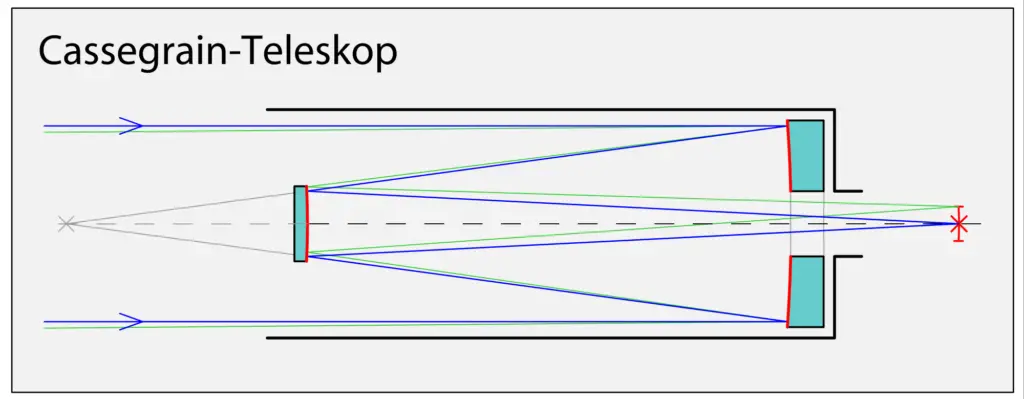
If you are looking for a telescope that combines the best features of refractors and reflectors, the catadioptric, or compound, telescope is your best bet. Invented in 1930, these instruments use both lenses and mirrors to form an image. The most popular forms of these telescopes are the Schmidt-Cassegrain and the Maksutov-Cassegrain, and their best feature is their compactness. Their tubes are only two or three times longer and wider, thanks to the “optical fold” of light, making them easily transportable.
The smaller tube can use a lighter frame, making it more manageable, and you can obtain a wide-opening telescope with a compact length. However, like the Newtonian and other telescopes, the Schmidt-Cassegrain requires occasional optical collimation, which may not be ideal for those who do not want to undertake any mechanical work. Their fields of vision can also be narrow, and the performance of important lunar and planetary observations can be slightly degraded due to the secondary mirror in the instrument’s light path.
In terms of cost, opening by opening, the compound telescope is placed between the reflector and the refractor. While the opening of a reflector is cheaper than a compound telescope, the latter is more expensive than a reflector and less expensive than a refractor.
Like a Newtonian, well-constructed compound telescopes will provide images of a wide range of celestial bodies. These telescopes tend to be the most technologically advanced, with options such as computerised aiming and photographic adaptations. They are excellent telescopes for general observations and can use a wide variety of accessories.
Furthermore, like refractors, the compound telescope tubes are sealed to exclude most of the dust, which is a big plus for an instrument that you will take out of town. However, if you live in a place where frequent dew formation takes place (practically almost everywhere), a sort of collar or extension to prevent fogging of the corrector plate exposed on the front of the tube is a must.
The importance of a stable telescope mount
A solid, stable and well-functioning telescope mount is crucial for making the most of your telescope. Without it, even the best telescope in the world is useless. It should be capable of directing your telescope towards your desired target and then following it precisely as the Earth rotates.
A stable mount should not vibrate for more than a second when using moderately high power, and the view should not wobble so much that it becomes difficult to find the desired target. A poorly made mount can ruin the entire observing experience, so it is essential to invest in a high-quality mount.
There are two primary types of mounts: altazimuth (alt-az) and equatorial. An alt-az mount moves the telescope up and down (in altitude) and to the right and left (in azimuth), while an equatorial mount is inclined so that one axis is aligned with the Earth’s rotation axis. For small telescopes used for occasional observations, an alt-az mount will suffice.
A Dobsonian mount is a type of alt-az mount that is ideal for low-cost frames with a low center of gravity, making it intuitive to use and easy to set up. It features slow-motion controls that allow the telescope to move smoothly even in small amounts, which is crucial when using high powers. For astronomy telescopes and future astrophotography, an equatorial mount should be considered. It is easier to track a celestial body with a telescope mounted in this way, and with the proper alignment, turning the slow-motion controls of the polar axis is all that is required to keep an object in sight.
More advanced mounts, including modern high-tech alt-az mounts, incorporate electric motors that make the operation even easier. The choice of mount type depends on the individual’s specific needs and preferences. For occasional observers who prefer a portable telescope, an alt-az mount is the better option. However, for astrophotography and critical observations of the Moon and high-powered planets, an equatorial mount is recommended. While polar alignment may take some time, it is necessary for precise photography, and it becomes a routine practice over time.
GoTo Telescopes: A Double-Edged Sword
GoTo (Go-To) telescopes are computerised robotic telescopes that are becoming increasingly popular. They come in different styles, and their mounts are controlled from either a built-in computer or an external PC. With these telescopes, you can direct the telescope to any object stored in the computer database, making them an attractive option for novice stargazers who may find it difficult to locate distant galaxies, clusters of stars, and asteroids on their own.
However, while these robotic telescopes may seem like a dream come true, they are not a complete solution. Although well-constructed robotic telescopes can be fun to use, they are still evolving to the point where they will self-align themselves upon being turned on. Most GoTo systems require you to enter the geographical position of your observation site, the date, and the time of your observation session. The computer uses this information to calculate the position of any object you want to observe.
To ensure accuracy, you must level the telescope tube, point it towards the north or south (depending on your location), and initiate an alignment procedure that uses two bright stars to synchronise the coordinates of the telescope with those of the sky. This setup routine can be challenging for novices who do not know the sky well and may require practice to master.
The latest GoTo telescopes feature GPS devices that help you and the telescope locate your precise position and time, making the process of adjusting the settings somewhat easier. However, the question of how accurately the mechanical parts point the telescope where the electronic brain is directing it remains. With astronomical magnifications, even the slightest mistake can have a significant impact on the image quality, so there is no room for cuts in design and manufacturing costs.
One last tip to keep in mind: the money spent on the mount of a GoTo electronic telescope could be invested in a larger mount for a traditional telescope. Although robotic telescopes are evolving, traditional telescopes remain a reliable and sturdy option for stargazers who prioritize image quality and reliability over convenience.
Seekers:
When using a telescope at medium to high power, it can be frustrating to aim it at a target due to the small portion of the sky it shows. This is where a seeker comes in handy. A seeker helps you locate celestial bodies and is necessary for all telescopes except the smallest ones. The most common type of seeker is a miniature telescope attached via a holder next to the main telescope’s eyepiece. It has a low degree of magnification and a wider field of view and is equipped with a viewfinder. Once aligned with the main telescope, centering an object in the viewfinder places it in the field of view of the latter. It’s important to look for a high-quality, relatively large finder with an aperture (front lens) larger than 25mm. Avoid tiny and practically useless finders that are commonly found in cheap telescopes. A popular alternative is a red dot that projects a point or ring of light into the background when viewed from behind. While this option is intuitively simple, it is limited to objects observable with the naked eye due to the lack of magnification and limited light collection capacity.

Can I photograph what I see?
Assuming you have purchased a new telescope, you may want to use it to capture the beauty of a planetary image on film or emulate the stunning space photos found in magazines such as ‘Sky & Telescope’. While it’s possible to do so with the right equipment and inclination, it’s always wise to first get used to using your new telescope visually and explore the sky to become familiar with it. Astrophotography can be a challenging and rewarding endeavor, but it’s as much an art as a science. The learning curve can be steep, the equipment can be expensive, and obtaining the perfect photo can be time-consuming. While any telescope can allow you to photograph the Moon, you will need a telescope with a well-made, rigid, and precisely-oriented mount to capture anything else.
Each Telescope Has Its Price
Resist the temptation to buy the cheapest telescope available. Most of them have very low optical or mechanical quality, or both, and will likely disappoint you. If your budget is less than $200, consider purchasing a good pair of binoculars instead.
Quality telescopes can also be obtained second-hand from more experienced members of your local astronomy club. If you have good manual skills and enjoy working with wood, you can even build a top-quality Dobsonian reflector using purchased optical parts. Seek advice and assistance from older members of your local club if you are interested in building your own telescope.
When it comes to buying a telescope, avoid purchasing the largest and most expensive one you find. Start with the smallest and most manageable option that meets your observation needs. If you’re still learning to identify constellations, many of the advanced features of an expensive tool will be of no use to you. It’s important to consider the weight, assembly, transportation, and storage requirements of the telescope you select. Remember to save some of your budget for additional eyepieces, a detailed stellar atlas, and any other necessary accessories, especially if you plan on becoming an astrophotographer.
Final Thoughts
While there is no one perfect telescope for everyone, there is one that will be perfect for you. Consider your primary observation interest, where you plan to conduct your stargazing sessions, and what “portable” means to you when choosing a telescope. Contact your local astronomy club, which may have organized observation nights where you can try out different telescopes and chat with their owners. Use binoculars to familiarize yourself with star charts and guides to help you identify distant and hidden wonders. By doing this, you will develop the knowledge and skills necessary to use a telescope effectively.
Remember that a telescope represents a significant investment for many people. Take your time when choosing a telescope to ensure that you make the best decision for your needs. With careful consideration and planning, you will unlock a world of cosmic wonders that will bring you endless enjoyment and inspiration.